Showing posts with label winter. Show all posts

Friday, January 1, 2016

'Snow Easy Snow Globes!

I cannot believe that it's the new year!  I have so many things that I'm thankful for in the past year and excited to see where the new year takes me!  I've recently hit my second milestone on TPT and am super excited and feverishly working on something to celebrate {though, with this short break of ours and the fact that THREE out of 5 of us had a stomach bug... including me... kinda had me on a standstill}

I wanted to share a quick and easy project for you to start when you head back to school... Of course, it hasn't been too cold yet or I would have taken the kids' pictures before school left out for our winter break... but Mother Nature had other plans... I mean-we were in shorts and short sleeves on CHRISTMAS EVE!  (in Pennsylvania!  And to give you an idea of our usual temperature... every year on my time hop app has shown snow on those days! lol)


Step One-gather your supplies.  You need construction paper, crayons (or oil pastels for fun!), hot glue, fake snow (I get mine on clearance at the craft stores after Christmas!  One or 2 bags will get you through a class)  and clear plates... WATCH OUT on the plates.  You don't want to get plates that have anything on the bottom.. you know that say "recycle" etc...  it needs to be clear.  I have always gotten my plates at Party City.. THIS year I'm getting the smaller plates since I have more students  than in the past and need to fit them all out on the wall.

Step Two:  Take student pictures wearing their winter gear...  Or have some for them to wear.  Have them strike a "winter" pose.  Print them out.  I printed a 5x7 for the large plates.  I'm thinking this year I'll print them in a 4x6 size.

Step Three:  Trace the plate onto construction paper.  Have students draw a winter scene.  If able, give them their picture so they will know what it will look like once they glue their pic on the paper.  They could glue it now too.  TIP: make sure to tell them to not draw IMPORTANT things at the edge.  The plate will cover it up. ;)

Step Four:  Laminate the paper-this will protect it from the hot glue you'll be using later!

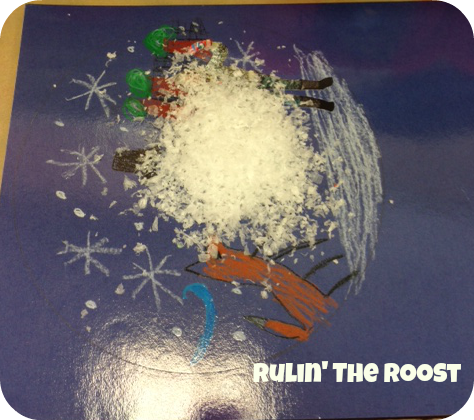
Step Five:  Put a few handfuls of snow in the center of the picture.


Step Six:  Squirt a little hot glue on the edge where the plate will go and place the plate face down-QUICKLY before it gets hard!


Step Seven: Jam hot glue underneath the plate the rest of the way around.  Pay special attention to the bottom so that the snow will not fall out.


Step Eight:  Have students write about it!  Use the following papers to help guide their writing!


{Click on the pictures to download the file!}


Step Nine:  Staple the paper to their projects and hang in the hall!


You'll be walking in a winter wonderland in no time at all!  Make sure to check out the other fabulous ideas from my friends in the i Teach Second hop!


Tuesday, January 28, 2014

Stuck in a Snow Globe writing

Well, this is the first month in my teaching career that I have had more days off than working.  This weather is getting a little cOLD!  And these storms have creeped up on us without too much of a warning!  yikes!

{This has been the scene of many mornings lately... and recently drives home due to the drifting snow!}

 {I feel like we are in Alaska!  We were checking out the local major river---that is ice jammed.  If you look behind my biggest's head---you can see ice blocks that have "washed" up ashore!}

I wanted to start a little series on my blog called "What We're Writing Wednesdays" but, it has been next to impossible to get anything together to show you!  So, this was a project that took us a few weeks to complete, but not because it was a long project... but we had too many delays and days off!
(I'm sure you have seen this all over pinterest, especially a few weeks ago)


This is the way I completed this project with my kiddlets:
Trace the clear plates (or bowls; that you would get at Party City;  I got the big dinner plates, cause they are first graders, and need lots of room to draw!) onto blue paper.

Students drew a winter scene inside---NOT drawing themselves.  While they were doing this, I had them get on their jackets, hats, scarves, etc.. and had them pose.  They were either super excited with hands in the air or they were freezing, hugging themselves.  They got to choose.

I printed the pictures 5X7 size.  Kids cut and glued (actually, I had to save time.  I cut them out, they glued).  I laminated the pictures.

Then the students wrote.  I wanted them to write using their senses, but we just didn't have time.  :(  So, the kids wrote a "first, next, then and last" narrative (CCSS aligned!) about the day they were stuck in a snow globe.  We talked about having one of the "steps" be that the globe got all shook up (and it might have messed up a snowman they were building, etc.)  Of course, some of my babes "missed" that info and just wrote about the fun things they did while they were in there---and that was okay, because we had days in between these steps.   While they were writing their final copies, I got the globes all snowy and glued.  I took a few pics while doing it, to show you what I found to be helpful.  (PS-I got the fake snow from Hobby Lobby on New Years Day at 70% off.  I bought 10 bags, not knowing what I would need.... I only needed ONE bag for my 19 kids.  I now have 10 years worth of snow---that I paid $10 total for!  lol)

Put a few handful of "snow" in the center of the drawn picture.


Start a little hot glue on one of the sides and place the plate down.


Jam the glue gun underneath the plate and squirt away---around the plate, making sure the BOTTOM of the plate is "hole-free" and secure!  Your custodians will thank you!


Staple the writing page below.  Hang in the hall for one spectacular display!  I can't believe all the people who stopped in my room just to say how adorable they were!  (I had figured that everyone saw them on Pinterest already)


Want the printable?  Click below!

https://drive.google.com/file/d/0ByB-1HaFtKDwYnFZcnpseVZVRW8/edit?usp=sharing

https://drive.google.com/file/d/0ByB-1HaFtKDwYnFZcnpseVZVRW8/edit?usp=sharing


What are you working on in your writing this week?


Friday, January 10, 2014

Classroom Snowball Fights!

We've been back to school now for what was supposed to be 7 days... however we had a snow day thrown in there and another day off because of the COLD!  There may have been a delay in there too, but I seriously cannot remember!  Does anyone know how many more days till summer?!?!

All this cold had inspired me to create some fun games to keep my kiddos attention, not to mention keep them awake!  They've been having trouble getting into the swing of things, and this fit the bill!

Snowball fights!  

http://www.teacherspayteachers.com/Product/Lets-Have-a-Snowball-Fight-Language-Arts-Edition-1048261http://www.teacherspayteachers.com/Product/Lets-Have-a-Snowball-Fight-Math-Edition-1044109

After a quick intro/lesson on the topic, I pass out recording sheets for the kids to write their names on.  Then I pass out the papers with what they will be sorting and/or answering.  {In the pack I have all of the words or number sentences typed out, but I also have a list of what is used so you can use scrap paper}  After going over the rules (no throwing at peoples faces... no running... etc..) the kids crumble up the paper that I had just given them (NOT the recording sheet!)

Give them 30 seconds or less to throw snowballs.  (I also crumble a few extras, because when it's time to find a snowball, there are always ones that get "lost" somewhere in the room... I mean, they are throwing them!)


I call out "macaroni and cheese" and they respond "everybody freeze!"  (Of course you could do your own thing there.  They grab the nearest snowball and head back to their desks.  I trained them to STAND and write--saves valuable seconds for this activity! ;)  They write their word (or number sentence, etc) where it belongs and crumbles the paper back up.


We repeat a few times.  (If they happen to get the same snowball, I tell them to switch it out with one of the extra balls laying around)  Sometimes we get more rounds in, sometimes less.  Depends on the day they are having.  I do NOT do it till they fill in the whole paper!


After this part is done, I allow them to take the snowball home that they had last, or they recycle.  It's funny.  I over hear my kids trying to persuade others to give them their ball.  They want to play it at home!  ha ha!

Then it's independent work time.  These activities vary, but the task is always very similar for the kids.  My goal when designing things is that it's very routine.  I don't want to spend time teaching the task EVERY TIME.  Plus, it helps them become more comfortable as well!


If you are interested in seeing what all is included in the packs, click on the pictures below.  OR I have them bundled together.  I plan on using these throughout the winter season.  No need to overkill it right now.  In fact, I may even use them as a "class reward!"

http://www.teacherspayteachers.com/Product/Lets-Have-a-Snowball-Fight-Language-Arts-Edition-1048261              http://www.teacherspayteachers.com/Product/Lets-Have-a-Snowball-Fight-Math-Edition-1044109

 **I also have a bundled version HERE**

***Important note:  I have done these at different times during the day, however---if you want your kids to go home excited and ready to talk to parents about their day-do it during the last 20-40 minutes of your day!  Guaranteed giggles and excitement.

Sunday, January 20, 2013

Snowmen!

Last week was an odd week.  Our kiddlets were getting tested.  DIBELed and the DDS (Diagnostic Decoding Survey---anyone out there do that??)  I was out half a day to do the DDS, while others pull my firsties for the DIBELS.

So, I decided that we needed a little imagination and creativity last week.  Do you know, I asked my kids what imagination was, and only a handful raised their hands?!!?!?!?!  I was in some serious shock.  Yeah, yeah.  I know everything out there doesn't allow for that imagination that we had growing up.  I remember loving my little cardboard box that I made into a playhouse, and then something else, etc...  It did give me a wake up call for my own children at home.  I need to do more pretending with them.  Even at 6-7 years old!  Creativity is a key to problem solving!  (IMO anyway---I don't have research or classes behind that theory, but do know that some problems need some creative solutions!  Without a little imagination, there's no creativity!)

So, we responded all week with imagination and creativity to the Snowmen at Night series books.  Boy did they have a blast!  They wrote what they thought their snowman does at night.  They created a job for their snowman and wrote a few "facts" about that job for the snowman (like he's a snow doctor and he makes sure that all the snowmen have nice white snow, etc..) and they wrote about what they would do with their snowman during the different seasons!  PRECIOUS!  I loved each and every response.  The only thing that would have made the week better was to actually have snow outside!  But we were having a little "heat wave" of mid 40s-50s, so there was no snow in sight... but some rain.  This week we're heading to the 20s... but, no snow in sight either.  I mean, if it is going to be freezing.... there needs to be snow!  (BUT NO SNOW DAYS!!!  I love me some summer!!!)

The word we did came from my packet:


The last day of our snowman things, we painted with "snow paint."  Have y'all seen those on pinterest?!  Well, I decided to try it out---without trying it out first!  ha!  I just mixed 1/2 and 1/2 of shaving cream and glue, plopped some down on construction paper.  Gave them a popcicle stick (for those who didn't want to touch it), put out scraps of felt, construction paper and googly eyes and let them have at it!  I just LOVED the giggles we had.  One little girl told me that it was even more fun than Kindergarten!  HA!  These little creations are still drying in my room.  Hopefully they will dry when I return on Tuesday to hang up in the hallway with their writing.  Fingers are crossed that I had enough glue to keep that shaving cream from disappearing!  I hear that the glue keeps it from evaporating.  Time will tell! :)


The was the best MESSIEST "paint" project ever.  Shaving cream does wonders on desks----so when they were done and I moved their masterpieces to dry-----the kids got wet paper towels and wiped down their desks!  (Of course, some had extremely clean desks while others---who are "neat" at their creations, only got a little cleaner)  lol  some probably even had even cleaner hair that evening or morning, whenever they washed their hair!  ;)

What's up for this week:  Martin Luther King, Jr. and the food groups!   (Both were just finished this weekend and put up in my store.  You can click on the pictures to read more about it!)


Related Posts Plugin for WordPress, Blogger...